保留正文与补采附件。源页面当前未重新核验;具体限制见交付清单。
 We value your privacy
We use cookies to enhance your browsing experience, serve personalised ads or content, and analyse our traffic. By clicking "Accept All", you consent to our use of cookies.
Customise Reject All Accept All
Customise Consent Preferences
 We use cookies to help you navigate efficiently and perform certain functions. You will find detailed information about all cookies under each consent category below.
The cookies that are categorised as "Necessary" are stored on your browser as they are essential for enabling the basic functionalities of the site. ... Show more
NecessaryAlways Active
Necessary cookies are required to enable the basic features of this site, such as providing secure log-in or adjusting your consent preferences. These cookies do not store any personally identifiable data.
-
Cookie
BCTempID
-
Duration
10 minutes
-
Description
No description available.
-
Cookie
__cf_bm
-
Duration
1 hour
-
Description
This cookie, set by Cloudflare, is used to support Cloudflare Bot Management.
-
Cookie
AWSALBCORS
-
Duration
7 days
-
Description
Amazon Web Services set this cookie for load balancing.
-
Cookie
_cfuvid
-
Duration
session
-
Description
Cloudflare sets this cookie to track users across sessions to optimize user experience by maintaining session consistency and providing personalized services
-
Cookie
li_gc
-
Duration
6 months
-
Description
Linkedin set this cookie for storing visitor's consent regarding using cookies for non-essential purposes.
-
Cookie
__hssrc
-
Duration
session
-
Description
This cookie is set by Hubspot whenever it changes the session cookie. The __hssrc cookie set to 1 indicates that the user has restarted the browser, and if the cookie does not exist, it is assumed to be a new session.
-
Cookie
__hssc
-
Duration
1 hour
-
Description
HubSpot sets this cookie to keep track of sessions and to determine if HubSpot should increment the session number and timestamps in the __hstc cookie.
-
Cookie
wpEmojiSettingsSupports
-
Duration
session
-
Description
WordPress sets this cookie when a user interacts with emojis on a WordPress site. It helps determine if the user's browser can display emojis properly.
-
Cookie
BCSessionID
-
Duration
1 year 1 month 4 days
-
Description
Blueconic sets this cookie as a unique identifier for the BlueConic profile.
-
Cookie
_octo
-
Duration
1 year
-
Description
No description available.
-
Cookie
logged_in
-
Duration
1 year
-
Description
No description available.
-
Cookie
__Secure-YEC
-
Duration
past
-
Description
YouTube sets this cookie to stores the user's video player preferences using embedded YouTube video
-
Cookie
__eoi
-
Duration
6 months
-
Description
Description is currently not available.
-
Cookie
AWSALBTGCORS
-
Duration
7 days
-
Description
No description available.
-
Cookie
login-status-p
-
Duration
past
-
Description
Description is currently not available.
-
Cookie
AWSALBTG
-
Duration
7 days
-
Description
No description available.
-
Cookie
csrf_token
-
Duration
session
-
Description
No description available.
-
Cookie
token_v2
-
Duration
1 day
-
Description
Description is currently not available.
-
Cookie
D
-
Duration
1 year
-
Description
Description is currently not available.
-
Cookie
PHPSESSID
-
Duration
session
-
Description
This cookie is native to PHP applications. The cookie stores and identifies a user's unique session ID to manage user sessions on the website. The cookie is a session cookie and will be deleted when all the browser windows are closed.
-
Cookie
VISITOR_PRIVACY_METADATA
-
Duration
6 months
-
Description
YouTube sets this cookie to store the user's cookie consent state for the current domain.
-
Cookie
cookietest
-
Duration
session
-
Description
The cookietest cookie is typically used to determine whether the user's browser accepts cookies, essential for website functionality and user experience.
-
Cookie
__Host-airtable-session
-
Duration
1 year
-
Description
This cookie is used to enable us to integrate the services of Airtable.
-
Cookie
__Host-airtable-session.sig
-
Duration
1 year
-
Description
This cookie is used to enable us to integrate the services of Airtable.
-
Cookie
m
-
Duration
1 year 1 month 4 days
-
Description
Stripe sets this cookie for fraud prevention purposes. It identifies the device used to access the website, allowing the website to be formatted accordingly.
-
Cookie
BIGipServer*
-
Duration
session
-
Description
Marketo sets this cookie to collect information about the user's online activity and build a profile about their interests to provide advertisements relevant to the user.
-
Cookie
__cfruid
-
Duration
session
-
Description
Cloudflare sets this cookie to identify trusted web traffic.
-
Cookie
_GRECAPTCHA
-
Duration
6 months
-
Description
Google Recaptcha service sets this cookie to identify bots to protect the website against malicious spam attacks.
-
Cookie
__Secure-YNID
-
Duration
6 months
-
Description
Google cookie used to protect user security and prevent fraud, especially during the login process.
-
Cookie
cookieyes-consent
-
Duration
1 year
-
Description
CookieYes sets this cookie to remember users' consent preferences so that their preferences are respected on subsequent visits to this site. It does not collect or store any personal information about the site visitors.
Functional
Functional cookies help perform certain functionalities like sharing the content of the website on social media platforms, collecting feedback, and other third-party features.
-
Cookie
lidc
-
Duration
1 day
-
Description
LinkedIn sets the lidc cookie to facilitate data center selection.
-
Cookie
brw
-
Duration
1 year
-
Description
No description available.
-
Cookie
brwConsent
-
Duration
5 minutes
-
Description
Description is currently not available.
-
Cookie
WMF-Uniq
-
Duration
1 year
-
Description
Description is currently not available.
-
Cookie
loom_anon_comment
-
Duration
1 year
-
Description
No description available.
-
Cookie
loom_referral_video
-
Duration
session
-
Description
Description is currently not available.
-
Cookie
VISITOR_INFO1_LIVE
-
Duration
6 months
-
Description
A cookie set by YouTube to measure bandwidth that determines whether the user gets the new or old player interface.
-
Cookie
yt-remote-connected-devices
-
Duration
Never Expires
-
Description
YouTube sets this cookie to store the user's video preferences using embedded YouTube videos.
-
Cookie
ytidb::LAST_RESULT_ENTRY_KEY
-
Duration
Never Expires
-
Description
The cookie ytidb::LAST_RESULT_ENTRY_KEY is used by YouTube to store the last search result entry that was clicked by the user. This information is used to improve the user experience by providing more relevant search results in the future.
-
Cookie
yt-remote-device-id
-
Duration
Never Expires
-
Description
YouTube sets this cookie to store the user's video preferences using embedded YouTube videos.
-
Cookie
yt-remote-session-name
-
Duration
session
-
Description
The yt-remote-session-name cookie is used by YouTube to store the user's video player preferences using embedded YouTube video.
-
Cookie
yt-remote-fast-check-period
-
Duration
session
-
Description
The yt-remote-fast-check-period cookie is used by YouTube to store the user's video player preferences for embedded YouTube videos.
-
Cookie
yt-remote-session-app
-
Duration
session
-
Description
The yt-remote-session-app cookie is used by YouTube to store user preferences and information about the interface of the embedded YouTube video player.
-
Cookie
yt-remote-cast-available
-
Duration
session
-
Description
The yt-remote-cast-available cookie is used to store the user's preferences regarding whether casting is available on their YouTube video player.
-
Cookie
yt-remote-cast-installed
-
Duration
session
-
Description
The yt-remote-cast-installed cookie is used to store the user's video player preferences using embedded YouTube video.
-
Cookie
cp_session
-
Duration
3 months
-
Description
Codepen sets this cookie for Help systems found in the website.
-
Cookie
loid
-
Duration
1 year 1 month 4 days
-
Description
This cookie is set by the Reddit. The cookie enables the sharing of content from the website onto the social media platform.
Analytics
Analytical cookies are used to understand how visitors interact with the website. These cookies help provide information on metrics such as the number of visitors, bounce rate, traffic source, etc.
-
Cookie
__hstc
-
Duration
6 months
-
Description
Hubspot set this main cookie for tracking visitors. It contains the domain, initial timestamp (first visit), last timestamp (last visit), current timestamp (this visit), and session number (increments for each subsequent session).
-
Cookie
hubspotutk
-
Duration
6 months
-
Description
HubSpot sets this cookie to keep track of the visitors to the website. This cookie is passed to HubSpot on form submission and used when deduplicating contacts.
-
Cookie
_ga
-
Duration
1 year 1 month 4 days
-
Description
Google Analytics sets this cookie to calculate visitor, session and campaign data and track site usage for the site's analytics report. The cookie stores information anonymously and assigns a randomly generated number to recognise unique visitors.
-
Cookie
ga*
-
Duration
1 year 1 month 4 days
-
Description
Google Analytics sets this cookie to store and count page views.
-
Cookie
__Host-psifi.analyticsTrace
-
Duration
6 hours
-
Description
Description is currently not available.
-
Cookie
__Host-psifi.analyticsTraceV2
-
Duration
6 hours
-
Description
Description is currently not available.
-
Cookie
_gh_sess
-
Duration
session
-
Description
GitHub sets this cookie for temporary application and framework state between pages like what step the user is on in a multiple step form.
-
Cookie
YSC
-
Duration
session
-
Description
YSC cookie is set by Youtube and is used to track the views of embedded videos on Youtube pages.
-
Cookie
ajs_anonymous_id
-
Duration
1 year
-
Description
This cookie is set by Segment to count the number of people who visit a certain site by tracking if they have visited before.
-
Cookie
vuid
-
Duration
1 year 1 month 4 days
-
Description
Vimeo installs this cookie to collect tracking information by setting a unique ID to embed videos on the website.
Performance
Performance cookies are used to understand and analyse the key performance indexes of the website which helps in delivering a better user experience for the visitors.
-
Cookie
AWSALB
-
Duration
7 days
-
Description
AWSALB is an application load balancer cookie set by Amazon Web Services to map the session to the target.
-
Cookie
acq
-
Duration
past
-
Description
Description is currently not available.
-
Cookie
acq.sig
-
Duration
past
-
Description
Description is currently not available.
-
Cookie
ptc
-
Duration
2 years
-
Description
No description available.
Advertisement
Advertisement cookies are used to provide visitors with customised advertisements based on the pages you visited previously and to analyse the effectiveness of the ad campaigns.
-
Cookie
muc_ads
-
Duration
1 year 1 month 4 days
-
Description
Twitter sets this cookie to collect user behaviour and interaction data to optimize the website.
-
Cookie
guest_id_marketing
-
Duration
1 year 1 month 4 days
-
Description
Twitter sets this cookie to identify and track the website visitor.
-
Cookie
guest_id_ads
-
Duration
1 year 1 month 4 days
-
Description
Twitter sets this cookie to identify and track the website visitor.
-
Cookie
personalization_id
-
Duration
1 year 1 month 4 days
-
Description
Twitter sets this cookie to integrate and share features for social media and also store information about how the user uses the website, for tracking and targeting.
-
Cookie
guest_id
-
Duration
1 year 1 month 4 days
-
Description
Twitter sets this cookie to identify and track the website visitor. It registers if a user is signed in to the Twitter platform and collects information about ad preferences.
-
Cookie
bcookie
-
Duration
1 year
-
Description
LinkedIn sets this cookie from LinkedIn share buttons and ad tags to recognize browser IDs.
-
Cookie
__Secure-ROLLOUT_TOKEN
-
Duration
6 months
-
Description
YouTube sets this cookie to manage feature rollout and experimentation. It helps Google control which new features or interface changes are shown to users as part of testing and staged rollouts, ensuring consistent experience for a given user during an experiment.
-
Cookie
yt.innertube::nextId
-
Duration
Never Expires
-
Description
YouTube sets this cookie to register a unique ID to store data on what videos from YouTube the user has seen.
-
Cookie
yt.innertube::requests
-
Duration
Never Expires
-
Description
YouTube sets this cookie to register a unique ID to store data on what videos from YouTube the user has seen.
-
Cookie
session_tracker
-
Duration
session
-
Description
This cookie is set by the Reddit. This cookie is used to identify trusted web traffic. It also helps in adverstising on the website.
-
Cookie
edgebucket
-
Duration
session
-
Description
Reddit sets this cookie to save the information about a log-on Reddit user, for the purpose of advertisement recommendations and updating the content.
-
Cookie
did
-
Duration
1 year
-
Description
Arbor sets this cookie to show targeted ads to site visitors.This cookie expires after 2 months or 1 year.
Uncategorised
Other uncategorised cookies are those that are being analysed and have not been classified into a category as yet.
No cookies to display.
Reject All Save My Preferences Accept All
Toggle SearchToggle Mobile Navigation
Publish AI, ML & data-science insights to a global community of data professionals.
Sign inSubmit an Article
LatestEditor's PicksNewsletterShipAI
Write For TDS
LinkedInXToggle Search
Data Science
Build a Convolutional Neural Network from Scratch using Numpy
Master Computer Vision by building a CNN from scratch all by yourself.
Riccardo Andreoni
November 23, 20238 min read
Master computer vision by building a CNN from scratch all by yourself
 These colored windows remind me of the layers of CNNs and their filters. Image source: unsplash.com.
As Computer Vision applications are now present everywhere in our daily lives, it is fundamental for every Data Science practitioner to understand their functioning principles and familiarize themselves with them.
In this article, I built a Deep Neural Network without relying on popular modern deep learning libraries like Tensorflow, Pytorch, and Keras. I then classified images of handwritten digits with it. While the achieved results didn't reach state-of-the-art levels, they were nevertheless satisfactory. Now, I want to take a further step in developing a Convolutional Neural Network (CNN) using only the Python library Numpy.
Python deep learning libraries, like the ones mentioned above, are extremely powerful tools. However, as a downside, they shield Data Science practitioners from understanding the low-level functioning principles of Neural Networks. This is especially true with CNNs, as their processes are less intuitive compared with the classical fully connected networks. The only way to address this issue is to get our hands dirty and implement CNNs ourselves: this is the motivation behind this task.
Learn this step by step with the interactive AI and Data Scientist, Computer Science and Machine Learning roadmaps.
This article is intended as a practical, hands-on guide rather than a comprehensive guide of CNN functioning principles. As a consequence, the theoretical part is concise and mostly serves the understanding of the practical section. For this reason, you will find an exhaustive list of resources at the end of this post. I warmly invite you to check them out!
Convolutional Neural Networks
Convolutional Neural Networks use a specific architecture and operations that make them well-suited for tasks related to images , such as image classification, object localization, image segmentation, and more. Their design roughly mirrors the human visual cortex , where each biological neuron responds to only a small portion of the visual field. Moreover, higher-level neurons react to the outputs of lower-level neurons.
While classical fully connected networks can handle image-related tasks, their effectiveness degrades significantly when applied to medium or large images due to the large number of parameters they require. For instance, a 200x200 pixel image contains 40,000 pixels, and if the first layer of the network has 1,000 units, it results in 40 million weights just for that layer. This challenge is highly alleviated by CNNs as they implement partially connected layers and weight sharing.
The main components of a Convolutional Neural Network are:
- Convolutional layers
- Pooling layers
Convolutional Layer
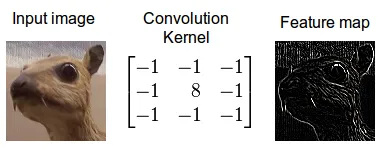
A convolutional layer consists of a set of filters , also known as kernels. When applied to the input of the layer, these filters modify the original images in specific ways.
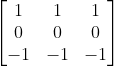
A filter can be described as a matrix, whose elements values define the king of modification applied to the original image. For instance, a 3x3 kernel, like the following one, highlights the vertical edges of the image:
 This kernel instead accentuates the horizontal edges:
 Source: Wikipedia.
It is important to note that the values of the elements of these kernels are not manually chosen but are parameters that the network learns during the training process.
The main function of convolutions is to isolate and highlight the different features present in the image. Later on, dense layers will use these features.
Pooling Layer
Pooling layers are more simple than convolutional layers. Their purpose is to minimize the computational load and memory usage of the network. They achieve this task by downsizing the input image's dimensions. Reducing the dimension results in a reduction of the number of parameters that the CNN has to learn.
Pooling layers also employ a kernel, typically of dimension 2x2, to aggregate a section of the input image into a single value. For example, a 2x2 max pooling kernel extracts 4 pixels from the input image and outputs only the pixel with the maximum value.
Python Implementation
You can find all the code shown in this section in my GitHub repository.
GitHub - andreoniriccardo/CNN-from-scratch: Convolutional Neural Network from scratch
The concept behind this implementation consists of creating Python classes that represent the convolutional and max pooling layers. Furthermore, as this CNN will be applied to the famous open-source MNIST dataset, I also create a specific class for the Softmax layer.
Within each class, I define the methods that perform the forward propagation and backpropagation steps.
As a final step, the layers are appended into a list to build the final Convolutional Neural Network.
Convolutional Layer Implementation
The code defining a convolutional layer is the following:
python
class ConvolutionLayer:
    def __init__(self, kernel_num, kernel_size):
        self.kernel_num = kernel_num
        self.kernel_size = kernel_size
        self.kernels = np.random.randn(kernel_num, kernel_size, kernel_size) / (kernel_size**2)

    def patches_generator(self, image):
        image_h, image_w = image.shape
        self.image = image
        for h in range(image_h-self.kernel_size+1):
            for w in range(image_w-self.kernel_size+1):
                patch = image[h:(h+self.kernel_size), w:(w+self.kernel_size)]
                yield patch, h, w

    def forward_prop(self, image):
        image_h, image_w = image.shape
        convolution_output = np.zeros((image_h-self.kernel_size+1, image_w-self.kernel_size+1, self.kernel_num))
        for patch, h, w in self.patches_generator(image):
            convolution_output[h,w] = np.sum(patch*self.kernels, axis=(1,2))
        return convolution_output

    def back_prop(self, dE_dY, alpha):
        dE_dk = np.zeros(self.kernels.shape)
        for patch, h, w in self.patches_generator(self.image):
            for f in range(self.kernel_num):
                dE_dk[f] += patch * dE_dY[h, w, f]
        self.kernels -= alpha*dE_dk
        return dE_dk
The constructor of the **ConvolutionLayer**class takes as inputs the number of kernels of the convolutional layer and their size. I assume to use only squared kernels of size**kernel_size**by**kernel_size**.
Later, I generate random filters of shape **(kernel_num, kernel_size, kernel_size)**and, for normalization, I divide each element by the squared kernel size.
The **patches_generator()**method is a generator. It yields the portions of the images on which to perform each convolution step.
The **forward_prop()**method carries out the convolution for each patch generated by the method above.
Finally, the **back_prop()**method is responsible for computing the gradient of the loss function with respect to each layer's weight. It also updates the weights' values correspondingly. Note that the loss function mentioned here is not the global loss of the network. Instead, it consists of the loss function passed by the max pooling layer to the previous convolutional layer.
To demonstrate the actual effect of this class, I created an instance of the **ConvolutionLayer**with 32 filters, each of size 3x3. Then I apply the forward propagation method on an image, resulting in an output consisting of 32 slightly smaller images.
The initial input image has size 28x28 pixels and is depicted below:
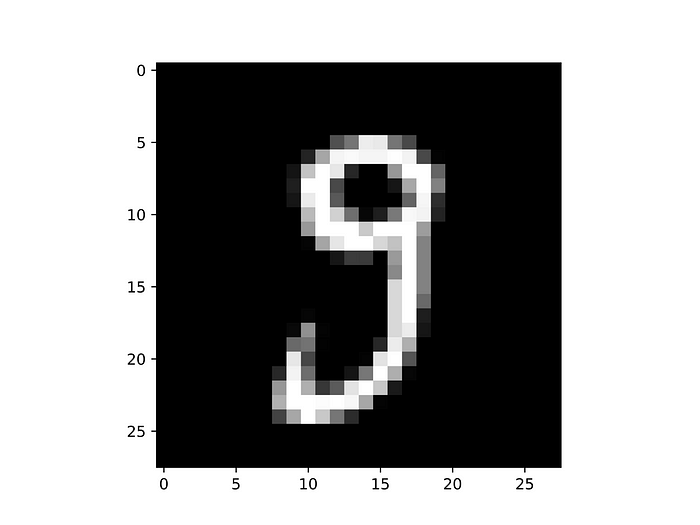 Image by the author.
Once I applied the
**forward_prop()**method of the convolutional layer, I obtain 32 images of size 26x26 pixels. One of them is the following:
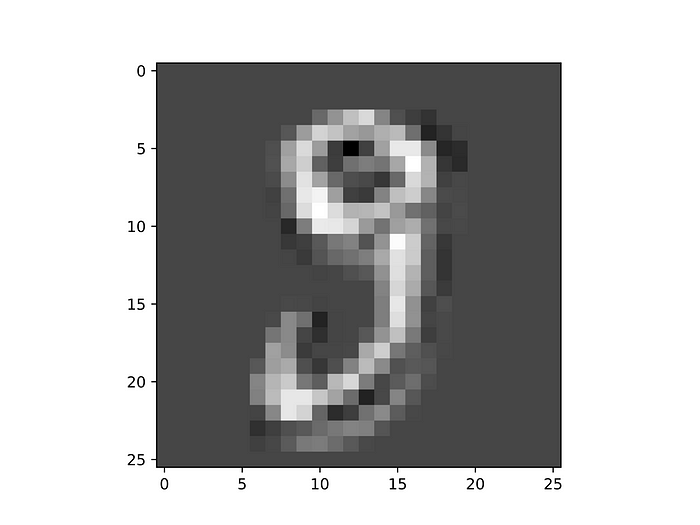 Image by the author.
As you can see, the image has been reduced in size, and the clarity of the handwritten digit is worse. It is important to note that this operation was carried out by a filter containing random values, and therefore, it does not accurately represent the actual step performed by a trained CNN. Still, you can grasp the idea of how these convolutions yield smaller images where the distinctive features of the object are isolated.
Max Pooling Layer Implementation
I used Numpy to define the Max Pooling layer class as follows:
python
class MaxPoolingLayer:
    def __init__(self, kernel_size):
        self.kernel_size = kernel_size

    def patches_generator(self, image):
        output_h = image.shape[0] // self.kernel_size
        output_w = image.shape[1] // self.kernel_size
        self.image = image

        for h in range(output_h):
            for w in range(output_w):
                patch = image[(h*self.kernel_size):(h*self.kernel_size+self.kernel_size), (w*self.kernel_size):(w*self.kernel_size+self.kernel_size)]
                yield patch, h, w

    def forward_prop(self, image):
        image_h, image_w, num_kernels = image.shape
        max_pooling_output = np.zeros((image_h//self.kernel_size, image_w//self.kernel_size, num_kernels))
        for patch, h, w in self.patches_generator(image):
            max_pooling_output[h,w] = np.amax(patch, axis=(0,1))
        return max_pooling_output

    def back_prop(self, dE_dY):
        dE_dk = np.zeros(self.image.shape)
        for patch,h,w in self.patches_generator(self.image):
            image_h, image_w, num_kernels = patch.shape
            max_val = np.amax(patch, axis=(0,1))

            for idx_h in range(image_h):
                for idx_w in range(image_w):
                    for idx_k in range(num_kernels):
                        if patch[idx_h,idx_w,idx_k] == max_val[idx_k]:
                            dE_dk[h*self.kernel_size+idx_h, w*self.kernel_size+idx_w, idx_k] = dE_dY[h,w,idx_k]
            return dE_dk
The constructor method only assigns the kernel size value. The following methods operate similarly to the ones defined for the convolutional layer, with the main difference being that the **back_prop()**method doesn't update any weight values. In fact, the pooling layerdoesnt' rely on weights to perform the aggregation.
Softmax Layer Implementation
Finally, I define the Softmax layer. It has the objective of flattening the output volume obtained from the final max pooling layer. The Softmax layer outputs 10 values, which can be interpreted as the probability of an image corresponding to the 0-to-9 digits.
The implementation has the same structure of the ones seen above:
python
class SoftmaxLayer:
    def __init__(self, input_units, output_units):
        self.weight = np.random.randn(input_units, output_units)/input_units
        self.bias = np.zeros(output_units)

    def forward_prop(self, image):
        self.original_shape = image.shape
        image_flattened = image.flatten()
        self.flattened_input = image_flattened
        first_output = np.dot(image_flattened, self.weight) + self.bias
        self.output = first_output
        softmax_output = np.exp(first_output) / np.sum(np.exp(first_output), axis=0)
        return softmax_output

    def back_prop(self, dE_dY, alpha):
        for i, gradient in enumerate(dE_dY):
            if gradient == 0:
                continue
            transformation_eq = np.exp(self.output)
            S_total = np.sum(transformation_eq)

            dY_dZ = -transformation_eq[i]*transformation_eq / (S_total**2)
            dY_dZ[i] = transformation_eq[i]*(S_total - transformation_eq[i]) / (S_total**2)

            dZ_dw = self.flattened_input
            dZ_db = 1
            dZ_dX = self.weight

            dE_dZ = gradient * dY_dZ

            dE_dw = dZ_dw[np.newaxis].T @ dE_dZ[np.newaxis]
            dE_db = dE_dZ * dZ_db
            dE_dX = dZ_dX @ dE_dZ

            self.weight -= alpha*dE_dw
            self.bias -= alpha*dE_db

            return dE_dX.reshape(self.original_shape)
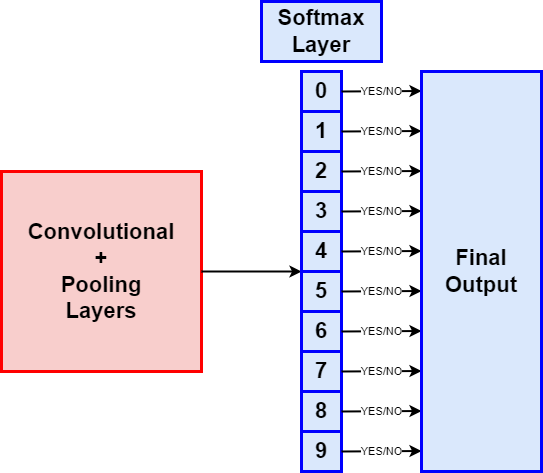 Image by the author.
Conclusions
In this post, we saw a theoretical introduction to the fundamental CNN architectural elements such as convolutional and pooling layers. I am positive that the step-by-step Python implementation will provide you a practical understanding of how these theoretical concepts can be translated into code.
I invite you to clone the GitHub repository containing the code and play with the **main.py**script. Of course, this network doesn't achieve state-of-the-art performances, as it is not built for this objective, but nevertheless reaches a96% accuracy after a few epochs.
Finally, in order to expand your knowledge about CNN and computer vision, I suggest checking some of the resources listed below.
If you liked this story, consider following me to be notified of my upcoming projects and articles!
References
Register Now to Continue Reading
Unlock Towards Data Science with a Free Account
All articles on Towards Data Science are available to registered users. Create a free account today to access this article and thousands more.
Register for freeSign in to your account
 Written By
See all from Riccardo Andreoni
Convolutional NetworkData ScienceHands On TutorialsMachine LearningProgramming
Share This Article
Towards Data Science is a community publication. Submit your insights to reach our global audience and earn through the TDS Author Payment Program.
Write for TDS
Related Articles
Programming
Adding an empty column to existing pandas DataFrame with Python
Giorgos Myrianthous
October 3, 20223 min read
Use your WhatsApp and Telegram data to train and chat with a GPT-2 neural network
Simone Guardati
October 19, 20206 min read
Artificial Intelligence
Build a simple Python RAG pipeline using your local files as context
Maria Mouschoutzi
June 26, 20256 min read
Machine Learning
Using Natural Language Processing (NLP) and K-Means to cluster unlabelled text in Python
Lily Wu
September 9, 20217 min read
Data Science
An Introduction to Causal Inference with DAGs and Bayesian Regression
Murray Gillin
February 4, 20239 min read
Artificial Intelligence
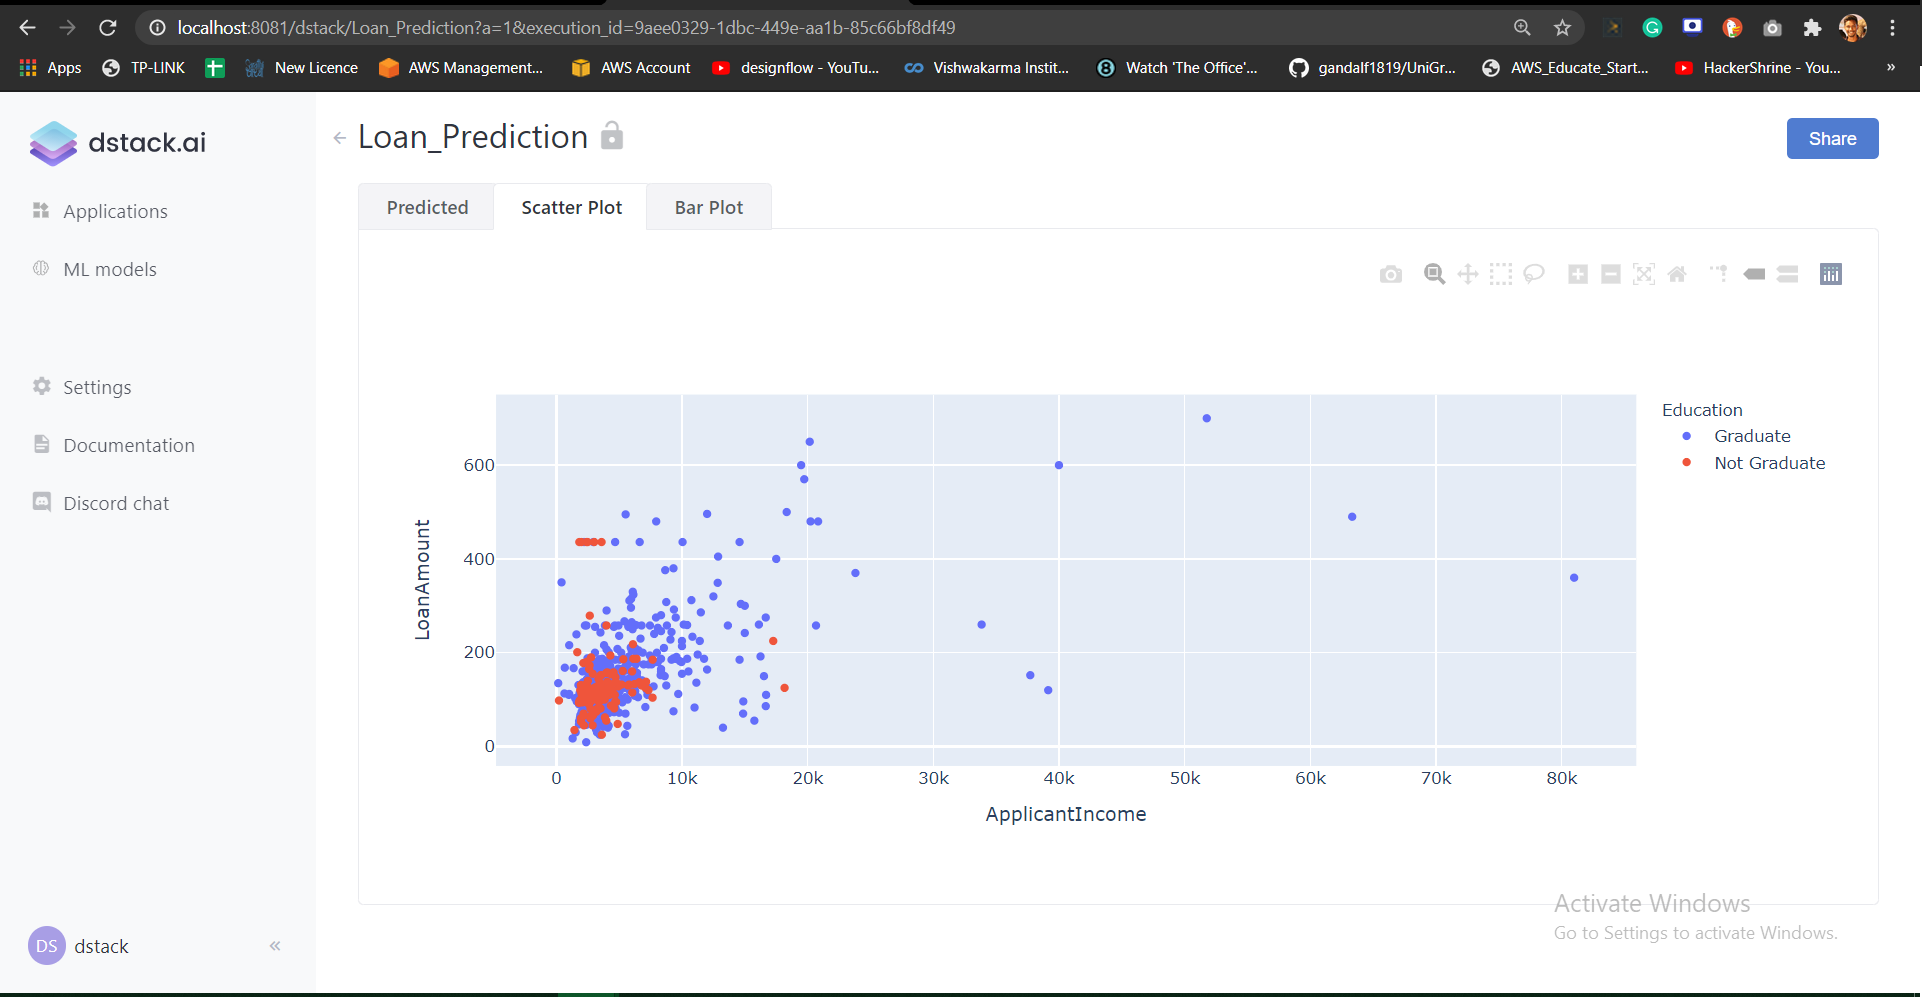
In this article, we are going to see how to use dstack.ai for creating ML apps. I have taken the loan prediction dataset.
Aniket Wattamwar
January 4, 20214 min read
Data Science
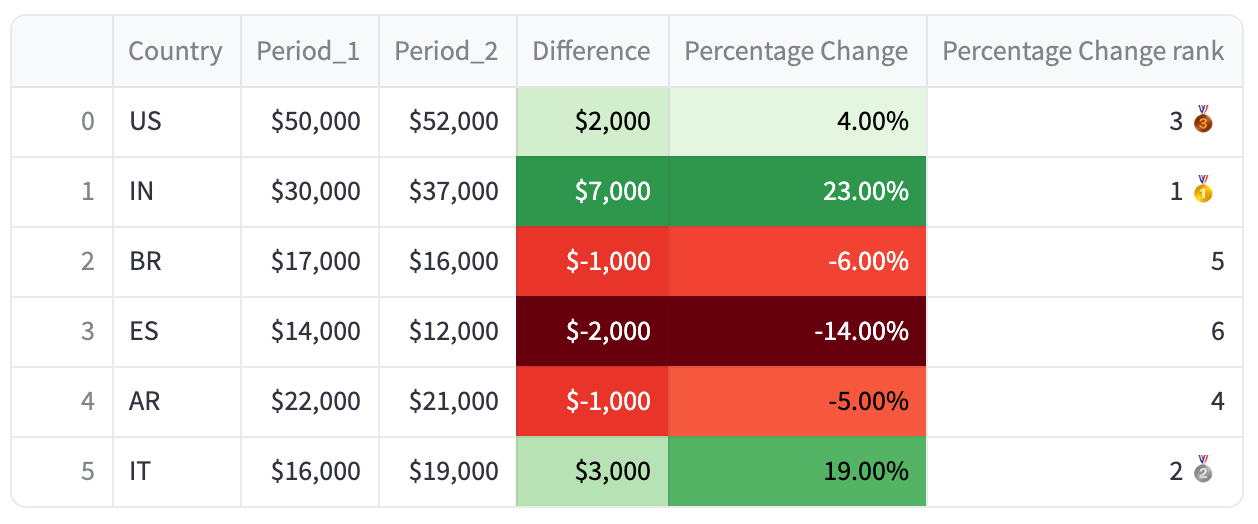
Streamlit and the pandas Styler object are not friends. But, we will change that!
Jose Parreño
August 14, 20246 min read
Machine Learning
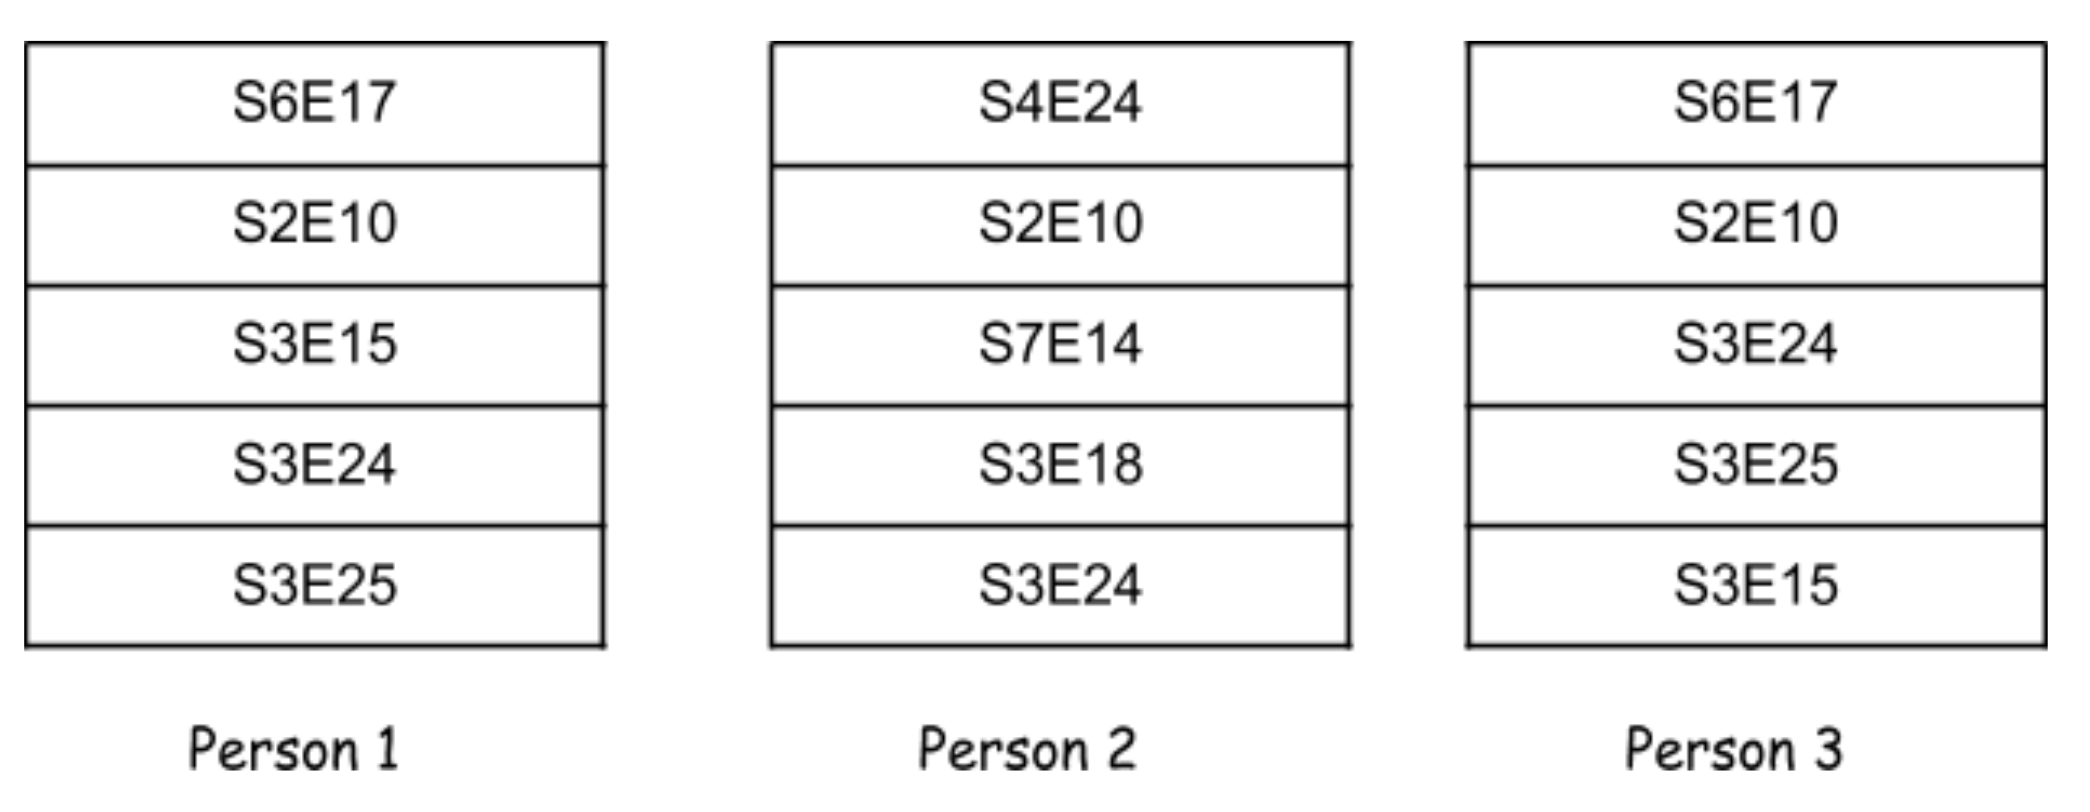
While working on ranking problems (feed ranking, search ranking etc.), I have often encountered situations when I needed to compare ranked...
Preetam Joshi
January 11, 20218 min read
Machine Learning
Interpreting Model Feature Importance
Sadrach Pierre, Ph.D.
August 9, 202110 min read
Your home for data science and AI. The world's leading publication for data science, data analytics, data engineering, machine learning, and artificial intelligence professionals.
Subscribe to Our NewsletterWrite For TDS•About•Advertise•Privacy Policy•Terms of Use
© Insight Media Group, LLC 2026•The New Stack•roadmap.sh•Creator Network
Recommended Articles
Close